
Menu
-
- Home
- Specialty Shape / Coastal Beach Molds
-
Woodworking Silicone Molds
-
Floral/Preservation Silicone Molds
- 2" & 3" Deep Alphabet Letter Molds
- 3" - 1.5" Deep Picture Frame Molds
- 3" Deep Hexagon Silicone Molds
- 3" Deep Square Molds
- 3" Deep Bookend Molds
- 3" Deep Arch Mold
- 3" Deep Heart Mold
- Deep Gem Molds
- 1.25", 2" & 3" Deep Cross Molds
- Memorials/Remembrance
- 3" Deep Rectangle Silicone Molds
- 3" Deep Large Round & Oval Molds
- 3" Deep Standing Round and Oval Molds
- 3" Deep Rainbow Molds
- 1.25" Deep Charcuterie Board Mold
- 1" - 2" Deep Square Molds
- 1" - 2" Deep Rectangle Molds
- 1" - 2" Deep Round Molds
- Specialty/Holiday
- 1" Deep Coaster Molds
- Paper Weight Molds
- Ornament Molds - Donut & Round
- 1/2" & 3/4" Serving Tray Molds
- Add-Ons/Functional Molds
- Resin Tools & Accessories
-
Arts & Crafts, Trays, Keychains, 3D, and more
-
Eye Candy Pigments
- Promise Epoxy
- Clearance - B Grade
-
- Contact Us
- Login
-
USD
hi
A column with no settings can be used as a spacer
Link to your collections, sales and even external links
Add up to five columns
hi
A column with no settings can be used as a spacer
Link to your collections, sales and even external links
Add up to five columns

Resin Crafts for Beginners: 9 Easy Project Ideas with Silicone Molds
October 30, 2026 6 min read
Getting Started with Resin Crafts
Getting into resin crafting doesn't have to be complicated. You don't need a full workshop or years of experience to make something you're proud of. Start with a manageable project, learn how your resin behaves, and build your skills from there.
One of the easiest ways to get started is with silicone molds for resin. They give your project a consistent shape, help create a smooth finish, and eliminate the need to build a casting form yourself.
At Zapp3D Design, our handmade silicone molds have glossy interiors that produce smooth, shiny castings. Finished pieces release cleanly without damage, and most won't need sanding, polishing, or touch-ups after demolding.
Before choosing your first project, our complete guide to silicone molds covers more about working with silicone for resin crafts, floral preservation, and woodworking.
Here's a basic supply list for getting started:
- Epoxy resin and hardener: Choose a product suitable for your project's depth and follow its mixing instructions.
- A silicone mold: Start with a shape and size that feel manageable.
- Measuring and mixing supplies: Use appropriate measuring containers, mixing cups, and stir sticks.
- Protective equipment: Follow the resin manufacturer's instructions for gloves, ventilation, and any required additional protection.
- Optional decorations: Resin-compatible pigments, glitter, or properly dried flowers can add personality.
- A clean, level workspace: Protect the work surface and keep dust away while the resin cures.
Now, here are nine resin project ideas worth trying, from small everyday pieces to larger decorative keepsakes.
9 Resin Craft Project Ideas to Try
1. Resin Coasters
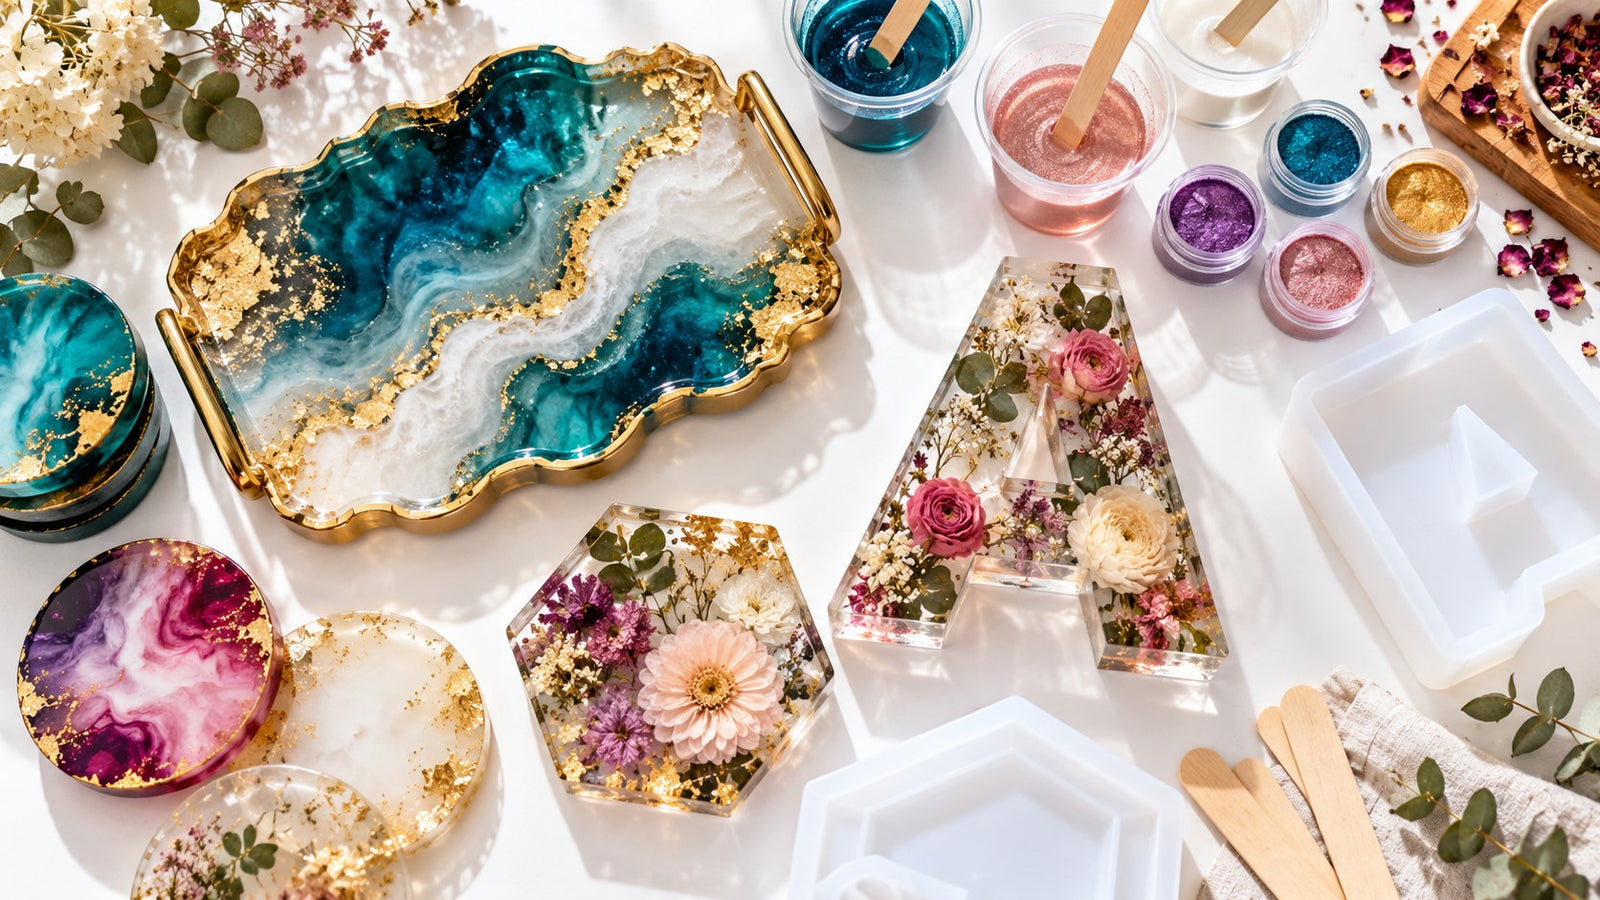
Coasters are one of the easiest resin crafts for beginners because they're relatively small and don't require a complicated design. Our coaster silicone molds include many shapes and sets, with most coasters measuring around 4 inches and typically 1 inch deep. Start with a simple clear or single-color pour, then experiment with pigments or layered designs as you get more comfortable.
2. Serving Trays
Once you're comfortable with smaller pieces, a serving tray is a natural next project. Browse our tray silicone molds for shapes that fit the design you have in mind. You can experiment with color combinations and decorative effects while learning to manage a larger volume of resin. Always use resin appropriate for the finished tray's intended use.
3. Alphabet Letter Keepsakes
Letter molds are a great way to make personal keepsakes using preserved flowers. Our Alphabet Letter Silicone Molds are 9 inches tall and 3 inches deep, with letters A–Z plus an ampersand available. They're designed for floral preservation, with the flowers arranged face up. Because these are deep molds, they're a better project once you're comfortable mixing resin and managing thicker pours.
4. Picture Frames
Resin picture frames are another way to turn your casting into a meaningful keepsake. You can experiment with colors or incorporate appropriately prepared dried flowers into the design. Pay attention to the mold's shape and depth, and make sure your resin is suitable for the amount you're pouring. A simple color palette is often easier to control than a complicated design on your first attempt.
5. Book-Shaped Molds
Our Sherlock Book Silicone Mold creates a solid decorative book, making it a favorite for preserving flowers and meaningful keepsakes. It comes in three sizes: Small (4" x 3" x 1 1/8"), Medium (5" x 4" x 1 1/2"), and Large (6 1/2" x 5" x 1 1/2"). The finished casting is a solid book-shaped display piece, not a storage box. For beginners, choose a suitable resin and plan your decorative arrangement before mixing.
6. Resin Crosses
Cross-shaped resin castings make beautiful decorative pieces and personal keepsakes, especially when preserving flowers from meaningful occasions. Our Cross Silicone Mold comes in five heights: 4", 6", 9", 13", and 20". The smallest is a 4-inch tabletop piece, making it a more manageable starting point than the larger versions. Keep your first design simple before experimenting with more detailed floral arrangements.
7. Deep Resin Hearts
Heart-shaped castings are a popular choice for preserving flowers and creating sentimental gifts. Our Deep Heart Silicone Molds come in 5", 7", and 9" sizes, all 3 inches deep. These molds offer room for dimensional floral arrangements, but the depth requires careful resin selection and pouring. If you're just starting out, practice your mixing and bubble-control techniques on smaller projects first.
8. Resin Keychains and Magnets
If you want quick, small-scale projects to practice with, keychains and magnets are worth exploring. Our keychain and magnet mold collection offers options for smaller resin crafts. They're useful for experimenting with pigments, simple color combinations, and decorative inclusions without committing to a large casting. Always follow the resin's cure instructions before handling or assembling finished pieces.
9. Holiday Ornaments
Holiday ornaments are a fun way to practice making seasonal resin decorations. You can keep the designs simple with one color or experiment with different visual effects as your skills improve. They're also an easy way to make personalized handmade gifts. Browse the store's ornament offerings or explore our best-selling silicone molds for more project inspiration.
Beginner Tips That Save Your First Pours
The mold is only part of a successful resin project. Most beginner frustrations come down to measuring, mixing, bubbles, temperature, or demolding too early. Here are a few things that make a noticeable difference.
- Measure accurately. Resin and hardener need to be measured according to the manufacturer's instructions. Some systems use volume ratios, while others use weight ratios. Don't assume they're interchangeable.
- Pay attention to resin temperature. Resin that's too cold can become thick and difficult to mix. If the manufacturer allows gentle warming, follow its instructions carefully. Never overheat the components.
- Mix slowly and thoroughly. Scrape the sides and bottom of your mixing container as directed. Stirring too aggressively introduces unnecessary air, while incomplete mixing can leave soft or sticky areas.
- Control surface bubbles. A brief, careful pass with a torch or heat gun may help remove surface bubbles if your resin manufacturer permits it. Avoid overheating the resin or damaging the silicone mold.
- Wait for the full cure. A casting can feel firm on the outside while still needing more time to cure. Follow the manufacturer's schedule instead of guessing.
- Keep your workspace clean and level. A stable, dust-free surface helps avoid uneven castings and unwanted debris. Protect the piece from dust while it cures.
One more tip: don't try every technique on your first project. A basic coaster with one resin color is a perfectly good place to start. Once you understand your resin's working time and curing behavior, more complicated designs become much easier.
Frequently Asked Questions About Beginner Resin Crafts
What is the easiest resin project for a beginner?
A simple resin coaster is a great first project. It's small enough to manage without mixing a large batch, and you can focus on measuring, stirring, pouring, and curing correctly. Start with a single color or clear resin before trying complicated decorations or multiple layers.
Do I need a release agent with silicone molds?
No. Our silicone molds don't require a release agent for demolding. Finished castings release cleanly, and the glossy interior helps produce smooth, shiny surfaces. However, an optional silicone-safe release spray can help extend the life of your mold. Always check the spray's compatibility and instructions before using it.
Why is my resin still sticky after a day?
There are several possible causes. The resin may still be within its normal curing period, especially if it's a slower-curing formula. Incorrect measuring, incomplete mixing, or low temperatures can also prevent proper curing. Check the resin manufacturer's instructions before handling the piece, and don't assume additional time will fix an incorrectly mixed batch.
How do I get rid of bubbles in my resin?
Start by mixing slowly to avoid introducing excess air. Pour carefully, and consider sealing porous inclusions such as dried flowers when appropriate. If your resin manufacturer allows it, a brief, gentle pass with a heat gun or torch can help clear surface bubbles. For deeper molds, use a resin formulated for the intended casting depth and follow its pouring instructions.
Start Simple and Build Your Resin Skills
Resin crafting gets easier with practice. You don't need to start with a complicated floral arrangement or a large, deep casting. Make a coaster, experiment with colors, learn your resin's curing time, and work your way toward bigger projects.
At Zapp3D Design, we're a family-owned, mother-and-son shop in Illinois. Every mold is handmade in the USA with a glossy interior designed to produce smooth, shiny castings that release cleanly. With over 75,000 molds sold, more than 10,000 five-star reviews, and fast shipping, we're proud to make molds that artists can feel confident using.
Explore our silicone molds, find a project that interests you, and enjoy the process of creating something by hand.
Leave a comment
Comments will be approved before showing up.
Sign up for new products alerts and discounts!
Sign up below!